Personally, I use quite often the terminal when I use my computer, laptop or whatever. As a result, I modified my terminal quite heavily to ease my work and to get the best out of the terminal. In the past, I did it mostly manually which requires a lot of attention from my side and regular upgrades when e.g. OS updates are performed. So I tried to reduce at least the effort I have to spent when enhancing the terminal.
The result was the combination of iTerm2 + zsh + oh-my-zsh + powerline + powerlevel9k. This combination covers roughly 95% of my requirements and reduced the effort I have to spend maintaining my terminal significantly. In this blog post, I’ll show you how you can get the same terminal that I use:
So, let’s start! I assume you have Homebrew installed on your macOS. If you don’t have Homebrew installed, I strongly recommend installing it, it’s a must-have when you work with macOS. You find the installation instructions on their homepage https://brew.sh/. With Homebrew you can install most of the required packages. But before we do this, let’s download the current stable iTerm2 version:
https://www.iterm2.com/downloads.html
Extract the ZIP file and move the app to your program folder. You can now start iTerm2. Once this is done you can install zsh:
brew install zsh zsh-autosuggestions zsh-syntax-highlighting
The next step is to install oh-my-zsh. This is fortunately also quite easy, just use this command:
sh -c "$(curl -fsSL https://raw.github.com/robbyrussell/oh-my-zsh/master/tools/install.sh)"
Most of the actions are now already completed. Next, we need to install powerline:
brew install python3
pip3 install powerline-status
I use powerline primarily for vim which needs to be configured in the .vimrc file:
" powerline
set rtp+=/usr/local/lib/python3.6/site-packages/powerline/bindings/vim
set laststatus=2
set t_Co=256
The last step is to install powerlevel9k. This can be done again with Homebrew:
brew tap sambadevi/powerlevel9k
brew install powerlevel9k
We now have all the required packages installed and we can start with the configuration. First things first, the built-in fonts do not fully support this configuration, you need to install an appropriate font first. I used the FiraCode light font. To install the font, you need to download the font to the font library:
mkdir ~/Downloads/FiraCode && cd ~/Downloads/FiraCode
wget https://github.com/tonsky/FiraCode/releases/download/2/FiraCode_2.zip
unzip FiraCode_2.zip
cp ttf/*.ttf ~/Library/Fonts/
cd ~/Downloads && rm -rf FiraCode/
The next step is the iTerm2 color scheme. I use Cobalt2 provided by Wes Bos at https://github.com/wesbos/Cobalt2-iterm. The color scheme needs to be downloaded and then imported into iTerm2:
cd ~/Downloads
curl https://raw.githubusercontent.com/wesbos/Cobalt2-iterm/master/cobalt2.itermcolors --output cobalt2.itermcolors
The color scheme can now be imported when the preferences in iTerm2 are opened and then profiles -> colors -> color preset -> import is chosen.
Last but not least, you need to modify the zsh configuration file to match your needs. My .zshrc looks like this:
# zsh configuration file
#
# Author: Thomas Bendler <code@thbe.org>
# Date:   Tue Sep 24 20:28:27 UTC 2019

# Add powerline support
POWERLINE_ZSH="/usr/local/lib/python3.7/site-packages/powerline/bindings/zsh/powerline.zsh"
[ -e "${POWERLINE_ZSH}" ] && source "${POWERLINE_ZSH}"

# If you come from bash you might have to change your $PATH.
export PATH="/usr/local/sbin:${PATH}"

# Path to your oh-my-zsh installation.
export ZSH="${HOME}/.oh-my-zsh"

# Uncomment the following line to use case-sensitive completion.
CASE_SENSITIVE="true"

# Uncomment the following line to change how often to auto-update (in days).
export UPDATE_ZSH_DAYS=7

# Uncomment the following line to enable command auto-correction.
ENABLE_CORRECTION="true"

# Uncomment the following line to display red dots whilst waiting for completion.
COMPLETION_WAITING_DOTS="true"

# Uncomment the following line if you want to change the command execution time
# stamp shown in the history command output.
# You can set one of the optional three formats:
# "mm/dd/yyyy"|"dd.mm.yyyy"|"yyyy-mm-dd"
# or set a custom format using the strftime function format specifications,
# see 'man strftime' for details.
# HIST_STAMPS="mm/dd/yyyy"

# Which plugins would you like to load?
# Standard plugins can be found in ~/.oh-my-zsh/plugins/*
# Custom plugins may be added to ~/.oh-my-zsh/custom/plugins/
# Add wisely, as too many plugins slow down shell startup.
plugins=(
  ansible
  battery
  brew
  bundler
  colorize
  docker
  dotenv
  git
  git-flow-avh
  iterm2
  nmap
  osx
  rake
  ruby
  sudo
  zsh-navigation-tools
)

ZSH_THEME="powerlevel9k"

source "${ZSH}/oh-my-zsh.sh"

# User configuration
# Load Zsh tools for syntax highlighting and autosuggestions
HOMEBREW_FOLDER="/usr/local/share"
source "${HOMEBREW_FOLDER}/zsh-autosuggestions/zsh-autosuggestions.zsh"
source "${HOMEBREW_FOLDER}/zsh-syntax-highlighting/zsh-syntax-highlighting.zsh"

# Powerlevel9k configuration
#POWERLEVEL9K_MODE="compatible"

# Left prompt - Configure indicator when working as root
POWERLEVEL9K_ROOT_INDICATOR_BACKGROUND="clear"
POWERLEVEL9K_ROOT_INDICATOR_FOREGROUND="red"

# Left prompt - Configure context (user@hostname)
POWERLEVEL9K_CONTEXT_DEFAULT_BACKGROUND="clear"
POWERLEVEL9K_CONTEXT_DEFAULT_FOREGROUND="magenta"

# Left prompt - Configure display of current directory
POWERLEVEL9K_DIR_HOME_BACKGROUND="clear"
POWERLEVEL9K_DIR_HOME_FOREGROUND="white"
POWERLEVEL9K_DIR_HOME_SUBFOLDER_BACKGROUND="clear"
POWERLEVEL9K_DIR_HOME_SUBFOLDER_FOREGROUND="white"
POWERLEVEL9K_DIR_ETC_BACKGROUND="clear"
POWERLEVEL9K_DIR_ETC_FOREGROUND="red"
POWERLEVEL9K_DIR_WRITABLE_FORBIDDEN_BACKGROUND="clear"
POWERLEVEL9K_DIR_WRITABLE_FORBIDDEN_FOREGROUND="red"
POWERLEVEL9K_DIR_DEFAULT_BACKGROUND="clear"
POWERLEVEL9K_DIR_DEFAULT_FOREGROUND="white"
POWERLEVEL9K_SHORTEN_DIR_LENGTH="3"
POWERLEVEL9K_SHORTEN_STRATEGY="truncate_middle"

# Right prompt - Configure command execution status indicator
POWERLEVEL9K_STATUS_OK_BACKGROUND="clear"
POWERLEVEL9K_STATUS_OK_FOREGROUND="green"
POWERLEVEL9K_STATUS_ERROR_BACKGROUND="clear"
POWERLEVEL9K_STATUS_ERROR_FOREGROUND="red"
POWERLEVEL9K_STATUS_CROSS="true"
POWERLEVEL9K_STATUS_VERBOSE="true"

# Right prompt - Configure command execution time measurement
POWERLEVEL9K_COMMAND_EXECUTION_TIME_BACKGROUND="clear"
POWERLEVEL9K_COMMAND_EXECUTION_TIME_FOREGROUND="white"

# Right prompt - Configure version control system
POWERLEVEL9K_VCS_CLEAN_BACKGROUND="clear"
POWERLEVEL9K_VCS_CLEAN_FOREGROUND="green"
POWERLEVEL9K_VCS_MODIFIED_BACKGROUND="clear"
POWERLEVEL9K_VCS_MODIFIED_FOREGROUND="darkorange"
POWERLEVEL9K_VCS_UNTRACKED_BACKGROUND="clear"
POWERLEVEL9K_VCS_UNTRACKED_FOREGROUND="red"
POWERLEVEL9K_SHOW_CHANGESET="true"
POWERLEVEL9K_CHANGESET_HASH_LENGTH="12"

# Right prompt - Configure display of running background jobs
POWERLEVEL9K_BACKGROUND_JOBS_BACKGROUND="clear"
POWERLEVEL9K_BACKGROUND_JOBS_FOREGROUND="green"

# Right prompt - Configure RAM settings
POWERLEVEL9K_RAM_BACKGROUND="clear"
POWERLEVEL9K_RAM_FOREGROUND="white"

# Right prompt - Configure load settings
POWERLEVEL9K_LOAD_CRITICAL_BACKGROUND="clear"
POWERLEVEL9K_LOAD_WARNING_BACKGROUND="clear"
POWERLEVEL9K_LOAD_NORMAL_BACKGROUND="clear"
POWERLEVEL9K_LOAD_CRITICAL_FOREGROUND="red"
POWERLEVEL9K_LOAD_WARNING_FOREGROUND="darkorange"
POWERLEVEL9K_LOAD_NORMAL_FOREGROUND="green"

# Right prompt - Configure battery status
POWERLEVEL9K_BATTERY_CHARGING_BACKGROUND="clear"
POWERLEVEL9K_BATTERY_CHARGING_FOREGROUND="white"
POWERLEVEL9K_BATTERY_CHARGED_BACKGROUND="clear"
POWERLEVEL9K_BATTERY_CHARGED_FOREGROUND="green"
POWERLEVEL9K_BATTERY_DISCONNECTED_BACKGROUND="clear"
POWERLEVEL9K_BATTERY_DISCONNECTED_FOREGROUND="darkorange"
POWERLEVEL9K_BATTERY_LOW_THRESHOLD="10"
POWERLEVEL9K_BATTERY_LOW_BACKGROUND="clear"
POWERLEVEL9K_BATTERY_LOW_FOREGROUND="red"
POWERLEVEL9K_BATTERY_VERBOSE=false

# Right prompt - Configure disk usage
POWERLEVEL9K_DISK_USAGE_NORMAL_BACKGROUND="clear"
POWERLEVEL9K_DISK_USAGE_NORMAL_FOREGROUND="green"
POWERLEVEL9K_DISK_USAGE_WARNING_BACKGROUND="clear"
POWERLEVEL9K_DISK_USAGE_WARNING_FOREGROUND="darkorange"
POWERLEVEL9K_DISK_USAGE_CRITICAL_BACKGROUND="clear"
POWERLEVEL9K_DISK_USAGE_CRITICAL_FOREGROUND="red"

# Right prompt - Configure IP address
POWERLEVEL9K_IP_BACKGROUND="clear"
POWERLEVEL9K_IP_FOREGROUND="white"

# Configure multiline prompt
POWERLEVEL9K_PROMPT_ON_NEWLINE="true"
POWERLEVEL9K_SHOW_CHANGESET="true"
POWERLEVEL9K_MULTILINE_FIRST_PROMPT_PREFIX=""
POWERLEVEL9K_MULTILINE_LAST_PROMPT_PREFIX="$ "
POWERLEVEL9K_LEFT_SEGMENT_SEPARATOR=""
POWERLEVEL9K_RIGHT_SEGMENT_SEPARATOR=""
POWERLEVEL9K_LEFT_SUBSEGMENT_SEPARATOR=""
POWERLEVEL9K_RIGHT_SUBSEGMENT_SEPARATOR=""

# Configure the prompt content
POWERLEVEL9K_LEFT_PROMPT_ELEMENTS=(root_indicator context dir vcs)
POWERLEVEL9K_RIGHT_PROMPT_ELEMENTS=(status command_execution_time ram disk_usage ip)
#POWERLEVEL9K_RIGHT_PROMPT_ELEMENTS=(status command_execution_time load ram disk_usage ip)

# Local custom snippets
for item in $(ls -1 ${HOME}/.profile.d/*.profile); do
  [ -e "${item}" ] && source "${item}"
done
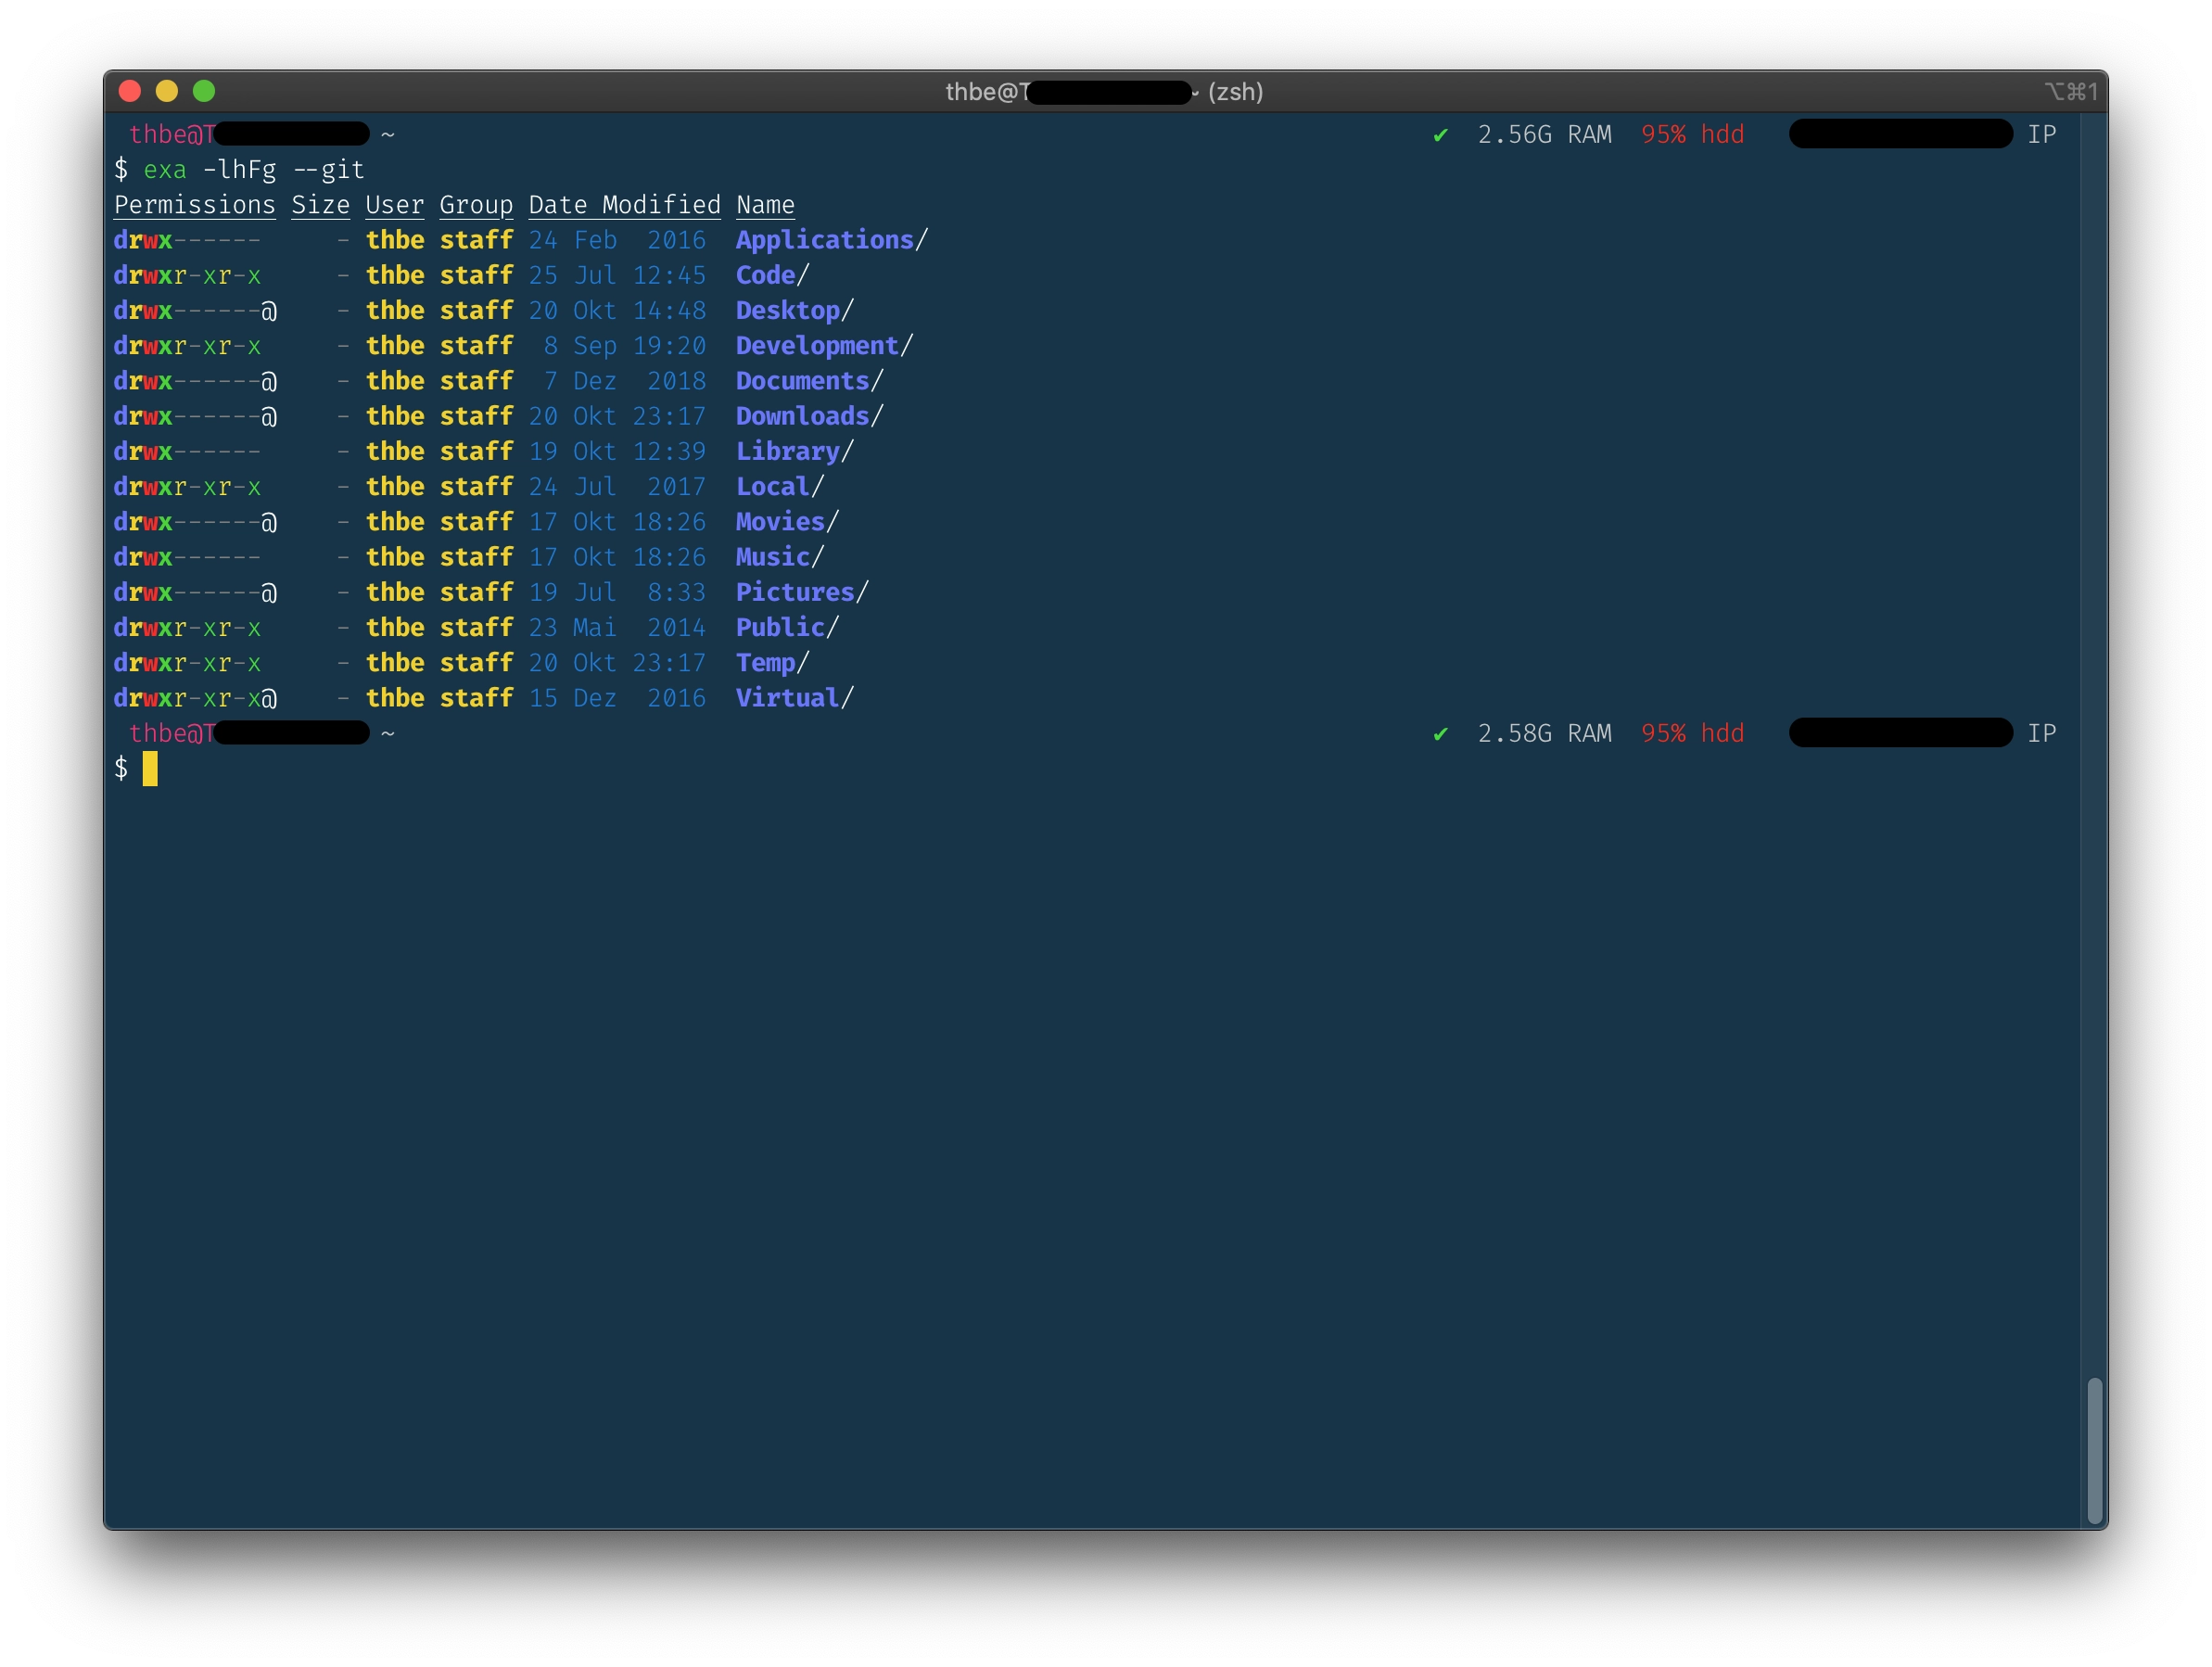
With these add-ons and configuration in place, your terminal should look like my one and should, if you don’t like it, at least be a good starting point to start your own configuration.