My traditional CI/CD pipeline I have used so far was primarily a combination of Github in conjunction with TravisCI. This combination worked pretty well for me but had some downsides. Based on the fact that I use a PRO account on Github I have to deal with public and private repositories. Unfortunately, the pipeline works only with public Github repositories but not with private Github repositories. Also, the way I handled secrets/ passwords that are required in the CD pipeline to deploy code to a third-party platform was not really satisfying me as it was completely manual and required personal hardware. However, when I saw that Github introduced Actions I thought it was worth a try to check it out and to play a little bit around with the new CI/CD pipeline. In the following article, I will share my experience with Github Actions as well as what is good and whatnot.
According to Github, Actions should automate your workflow from idea to production. Sounds good and is something I was looking for. But describing something on an advertising page looks, in reality, most likely somewhat different. So I picked one of the more complicated repositories I use that didn’t work before and tried to establish a CI/ CD pipeline based on Github Actions. The candidate I had chosen was my website you are currently visiting, more precise, the tools I use to build my website. As I already posted earlier I’m using Jekyll to build my site. All required actions to build and test my site are collected in a Ruby-based Rakefile. For example, when my site is compiled, I run HTML-Proofer to check the HTML code. Additional complexity was added by the fact that my website repository is private due to some parts I need to refactor first before I can release the code.
The first thing that is required is a workflow file. You need to create a directory called .github/workflows in your project root. Inside that directory, you have to create a YAML file. In my case, I named the first file development.yml but you can name it as you like as long as the file ends with “.yml”. This file contains the job and the associated actions the build pipeline will execute to test and deploy the code. The following file contains the CI part of the story, this means, it builds the website and check it for errors:
name: Development Workflow

on: [push]

jobs:
  test:
    name: CI Pipeline
    runs-on: ubuntu-latest
    steps:
      - name: Checkout master
        uses: actions/checkout@v1
      - name: Set up Ruby 2.6
        uses: actions/setup-ruby@v1
        with:
          ruby-version: 2.6.x
      - name: Setup bundler and required gems
        run: |
          gem install bundler
          bundle install --jobs 4 --retry 3
      - name: Build and test the website
        run: bundle exec rake
So, what does exactly happens in the configuration file? The first keyword defines the name of the workflow:

The second keyword “on” defines that the workflow should be executed every time I push code into my Github repository. The “jobs” keyword describes what should be executed in the workflow. You can define one or more jobs, depending on what you would like to execute.
The first version of the development.yml file I’ve shown before starts a container based on ubuntu-latest. After the start of the container, the configuration file defines four actions that should be executed inside the Ubuntu container. The first action that takes place is the checkout of my current git repository. The second action is to set up Ruby with version 2.6. Action number three setup the required Ruby packages based on the Gemfile in my repository root. When these three actions have been performed, the fourth action can do the effective test of my web site based on the Rakefile that is also defined in my git repository root.
Once the actions has been performed you can see the result in the Actions tab:
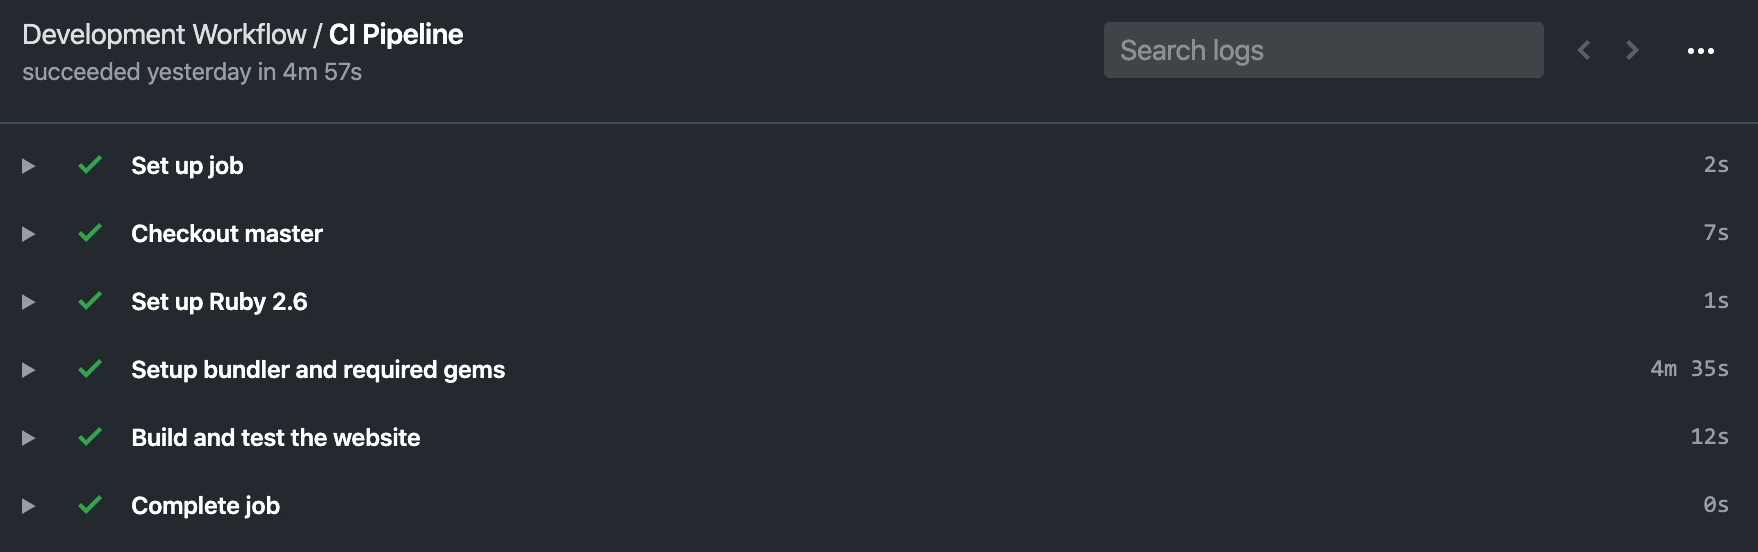
You can use the triangle to expand the performed steps to see the logs in detail.
The next post will cover the CD part to QA with Github Actions.
See also: