Warp 7 Mr. Scott
As promised, this blog post will describe the setup of the controller node. The intention of the controller node is, besides the management of the virtual platform, to provide the bootstrap functionality for the whole data center. So services like DNS, DHCP, kickstart and so on will be located on the controller node.
This will be relevant for the ordering when i.e. the whole data center goes down for maintenance. So let’s start right away with the setup. The first thing will be to kickstart the operating system on the controller node. The prerequisite for this is to download the SL 6.5 DVD ISO image and burn it to a DVD-R. You can download the ISO here. The next action is to prepare the kickstart script. You can download an example here. Adjust domain names and IPs to your needs and put the file on a website that you can access during installation. Keep in mind that you need to use HTTP, HTTPS is not working. Once this is done, you can enhance the site.pp file to fit your need or you just simply start with the demo site.pp file.
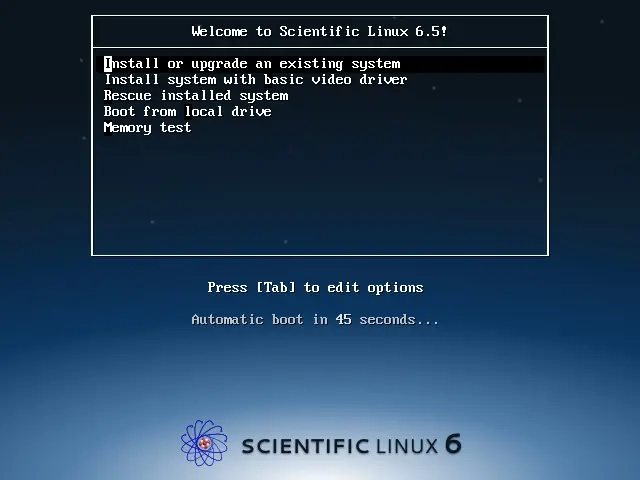
When you power up the controller node and the DVD you created is booted, you will see a screen like this:
You need to press [TAB] before the installation starts because you have to tell the installation kernel where to find the kickstart file. This look like this:
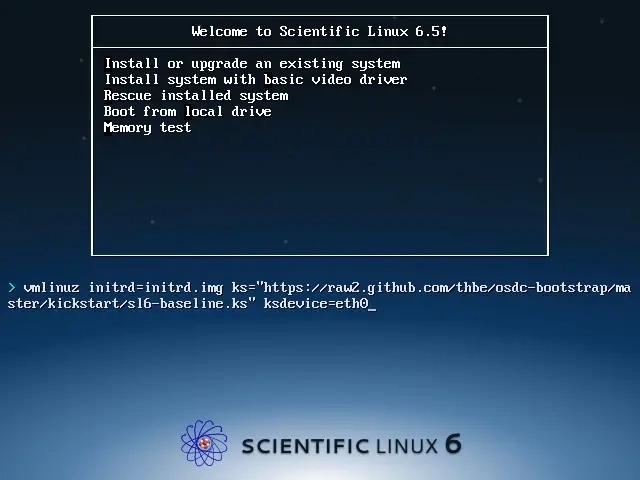
Replace the address with the address where your kickstart file is located. Press [RETURN] and wait until the installation is finished.
In the next post, I will describe the further steps to complete the installation on the controller node.